Bassoons accumulate dirt and finger oils. It’s a given, considering how much we play them, and where we go with them. The wood of your bassoon is protected with one of a variety of products. Common finishes include (but are not limited to) shellac, varnish, lacquer, polyurethane, and mineral oil. For those who want to know more about these finishes, here’s a pretty good overview. Most of these can be cleaned easily, and we show you how in this post.
Cleaning your own bassoon yields great benefits: saves you money, prolongs the life of your bassoon, keeps your bassoon functioning at its best, plus it’s easier than you think. Here are a few methods we recommend that you can do yourself.
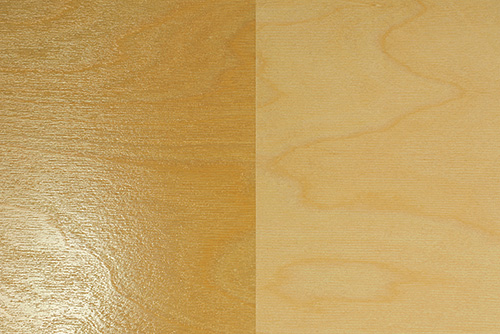
If the finish on the bassoon is fully intact, and the finish is glossy or shiny (not light hand rubbed French polish) we do what Fox Products recommends – we use Lemon Pledge! Any variation of this product will do, of course.
A small spritz on a paper towel, and light rubbing/application will remove dirt and leave a beautiful shine (and reasonably nice odor). For the hard to get to parts, use a standard q-tip and take your time. It’s a slow process to get it right without leaving too much cleaner behind. Remove all traces of Pledge, as droplets left behind can become a dust attractant. You might consider doing this once every year or two or even sooner if you notice a significant buildup of dirt.
If the finish is not shiny, it might have a “French polish” which uses an oil-based material and leaves a subtle matte finish. We recommend rubbing this kind of surface with a soft, clean cloth. That is usually ample. You can polish it now and then with a specialty wax or even with a tiny bit of furniture cream. Sticky marks can be removed with a small cloth soaked in warm, slightly soapy water and then fully wrung out.
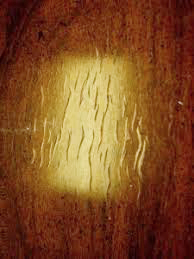
If the finish is crackled, there are unprotected wood areas, or it just seems delicate, we use a soft dry, cloth with little or no lint shedding. A paper towel can sometimes work well. If you get excessive amounts of wax, water or other substances on the raw wood, it won’t kill the bassoon, but it makes it harder for the repair tech to fix that area, and might raise the grain of the wood slightly, which could cause further damage around the edge of the exposed area. If there is exposed wood, we recommend bringing your bassoon to a repair technician before you apply any cleaning agent other than a dry cloth.
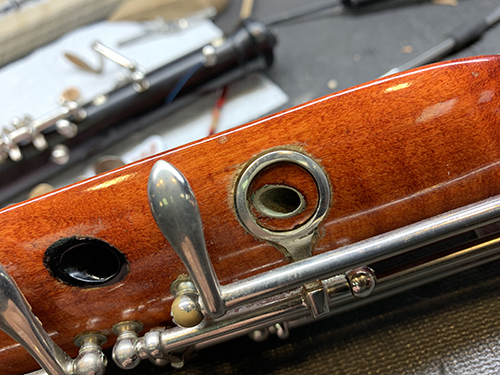
Dirt from your fingers can leave built up yuckiness near the finger holes, especially on the wing joint. To clean this, first try a dry cloth and rub the buildup, trying not to spread the dirt around. If that doesn’t do the job, a slightly dampened q-tip can sometimes work. If none of these work, an old world solution is to touch a clean q-tip to your tongue (brush your teeth first) and use that slightly dampened q-tip to do the work. The pH value of saliva is slightly acidic, which varies between pH 5.75 and 7.05. It works very well in some situations.
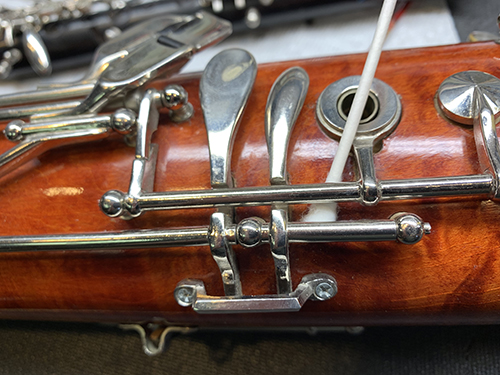
Sometimes you’ll see key oil build up around the posts. Wherever metal rubs on metal, it may appear as dark colored oil in very minute amounts. The dark colored oil is an indication that the oil is doing its job floating away dirt and debris that builds up. Use a dry q-tip to wipe away the excess oil from the metalwork. You don’t have to leave the bassoon immaculate. Just remove enough so that you can’t easily reach more of it and relax. Take care not to rub the key oil into the wood as much as possible. It won’t hurt anything in the short term, but it does become an attractant for dust and dirt and can make cleaning the wood more time consuming. When you next get your bassoon worked on, ask the repair tech to clean the rods and posts and apply new oil. If you have sufficient experience, you can also clean and apply key oil yourself.
If you care to share your experiences with us, we’re very interested in how this works out for you.


What a great article! So practical. Loved the photos too. Loved the real life examples. Julie